
Whale Costume Character Design
Organic Modeling and Hand Texturing
As I evolve my skillset, one of my goals is to become more familiar with Character Design, Modeling and Texturing. I grew up drawing as a child, which included a crazy amount of monsters and creatures that were bouncing around in my mind as a precocious young boy. Although I have matured past that, I can still be fascinated with interesting creatures, monsters and characters. In all my years as a 3D artist, I had never been taught, or worked on, character creation and felt it was a good time to explore this avenue of 3D creation.
Every Good Character Starts as a Sketch
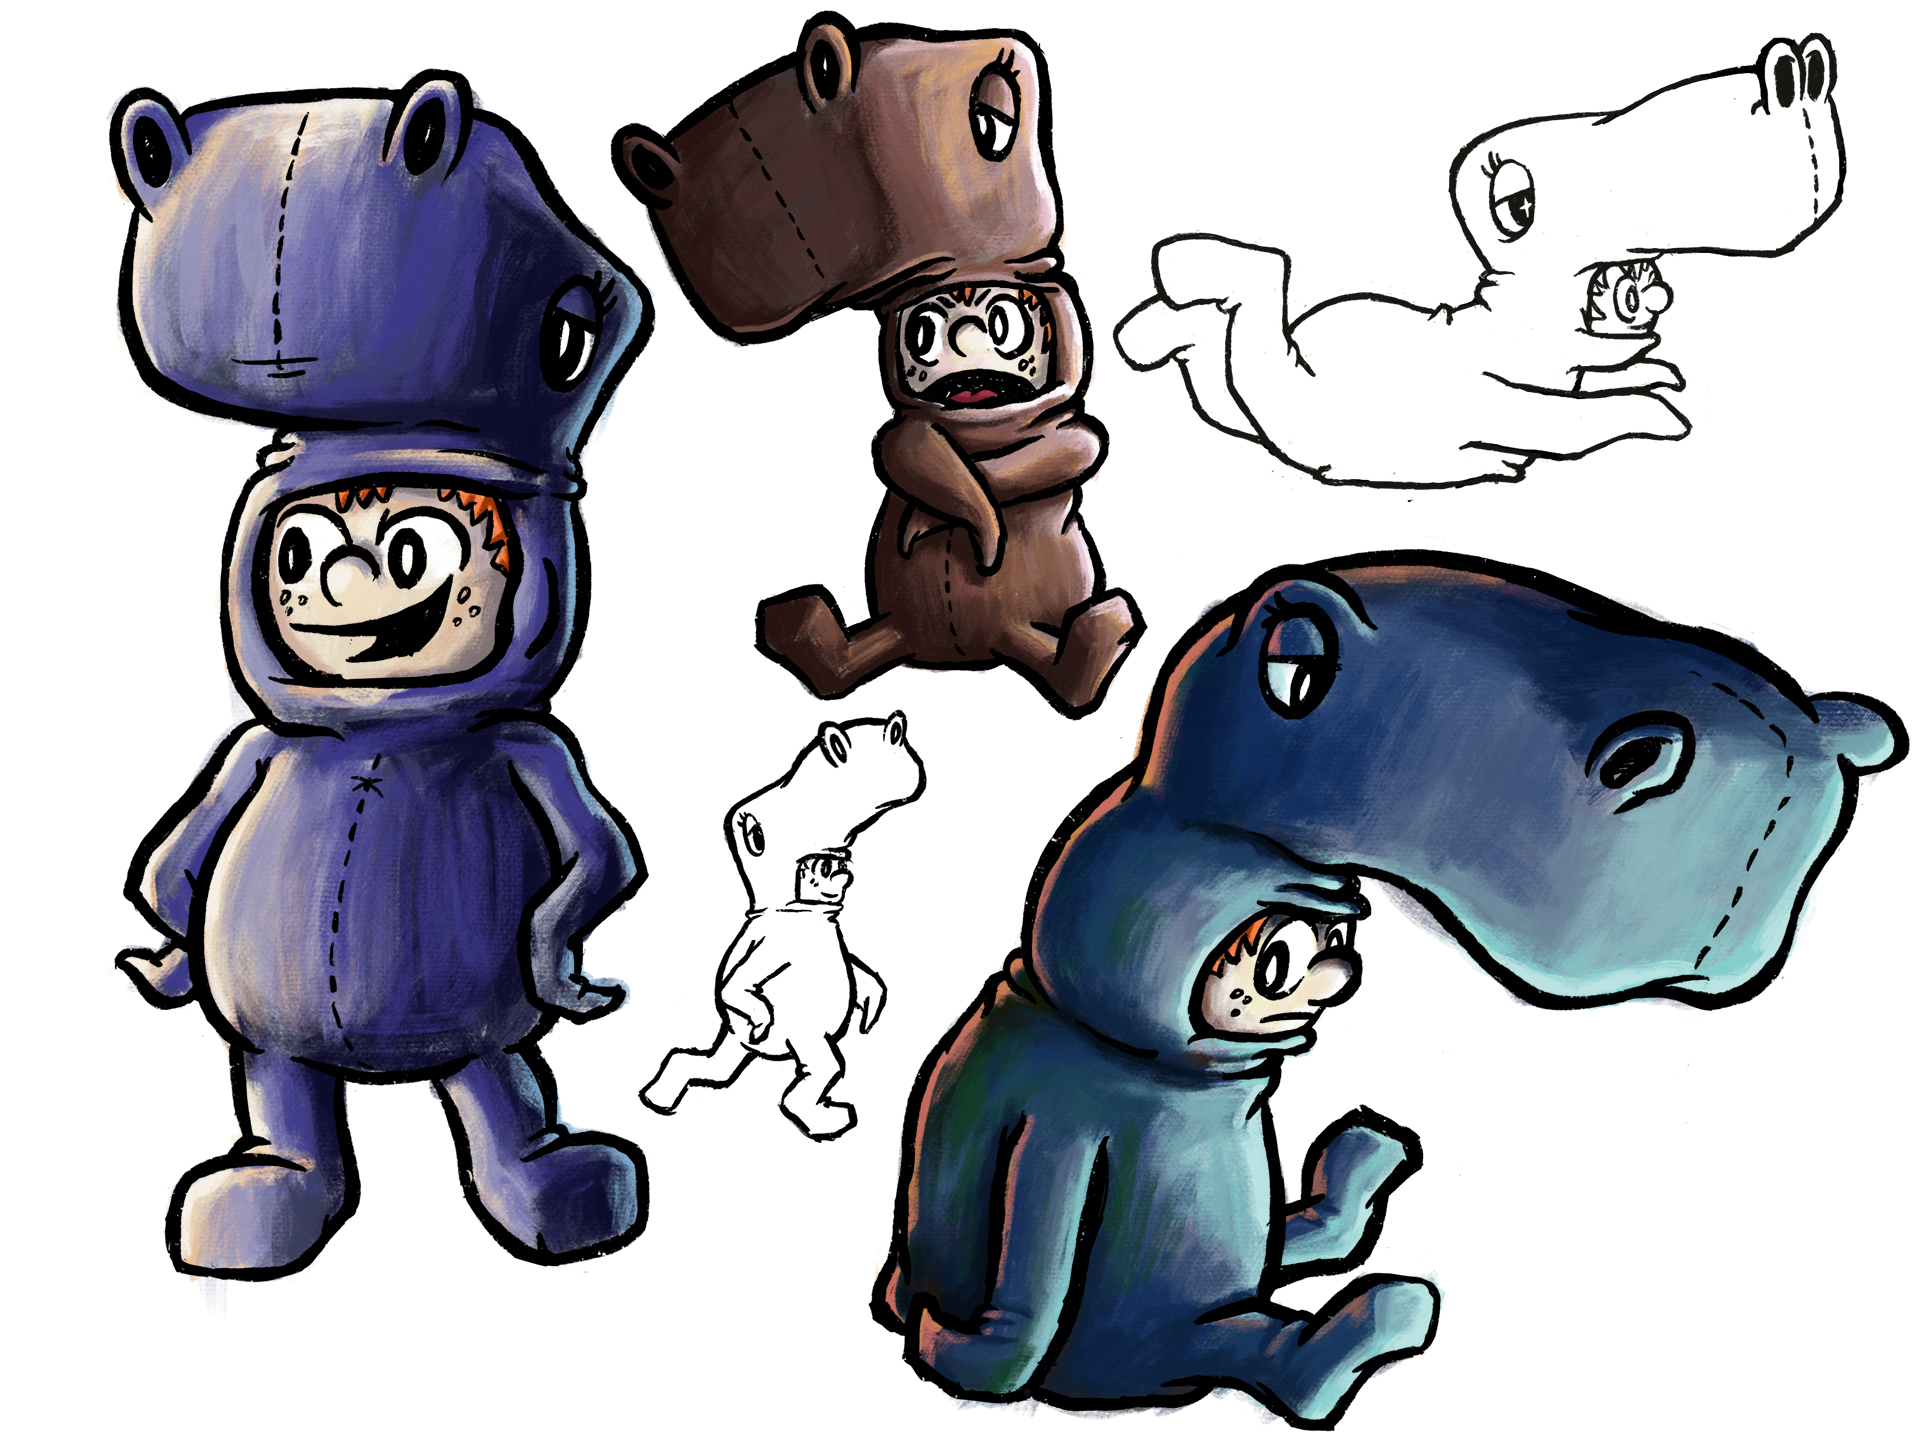
In order to start down the path of 3D character creation I felt I needed to go back to my roots and sketch something down. I could have taken someone else's character design and run with it, but I wanted to also practice digital painting and understand some illustration techniques while I was on this journey. My hope in creating a character was to try and hand paint the UV maps to give it a more unique and handcrafted look. I have drawn this little kid in a whale suit for a number of years and thought he could be a good start in my exploration. I drew him from different angles and different poses to try and get an idea of elements that were to be retained in the final form. The funny eyes, the blocky feet, the flippers for arms were some elements that had a certain style to them as I drew them over and over again. This visualization gave me great insights into how i wanted to craft the character.
Narrowing Details and Brushstrokes
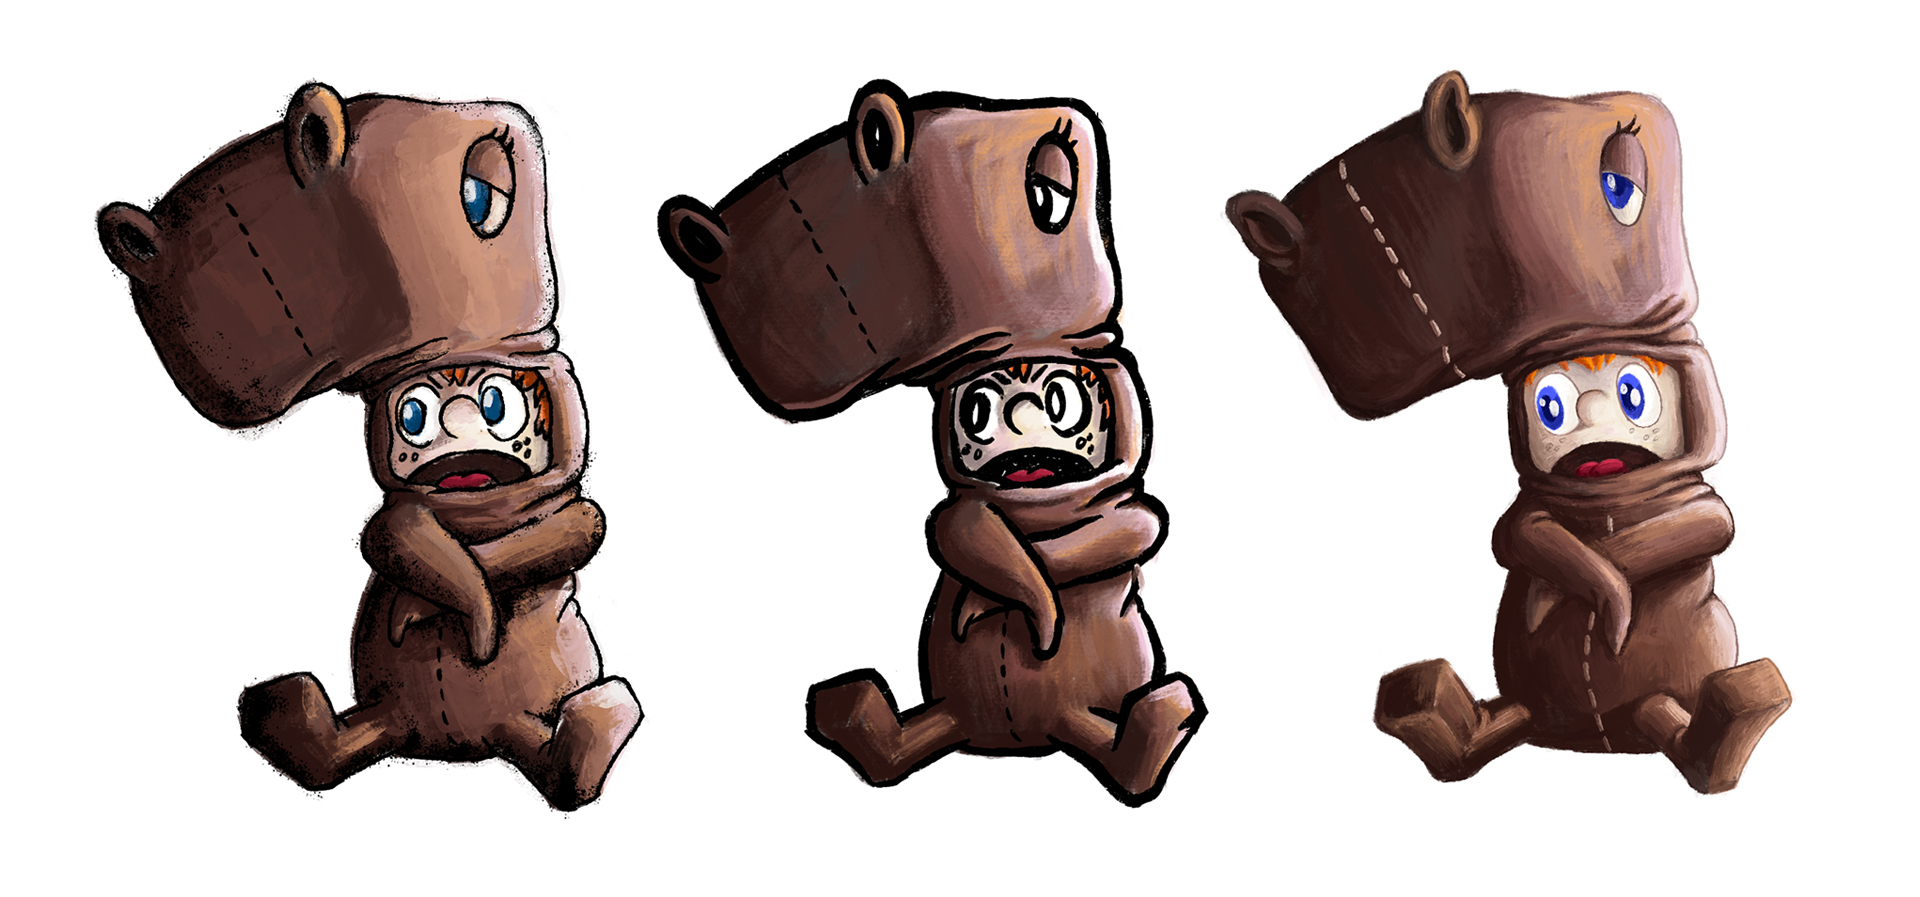
Once I felt pretty good about where the style of the character was going, I started exploring some ideas around brush strokes, lighting and shading, color blending, levels of realism and how much polish this guy needed. I was trying to avoid just building a character that would look like another version of every Pixar or Pixar-like character out there. I was surprised at the change in vibe the character had depending on how the elements mentioned above were modified. Heavy black lines made the character feel considerably different then thin colored lines.
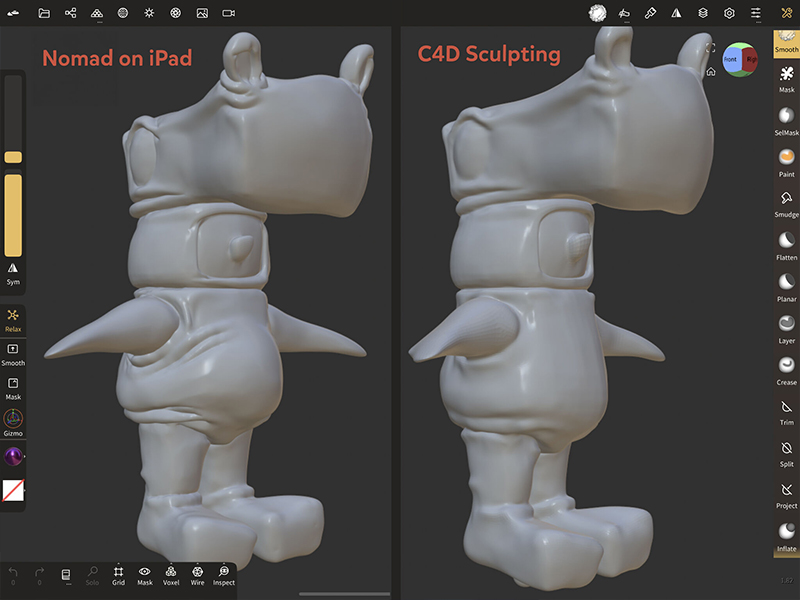
Can Cinema4D Excel at Organic Modeling?
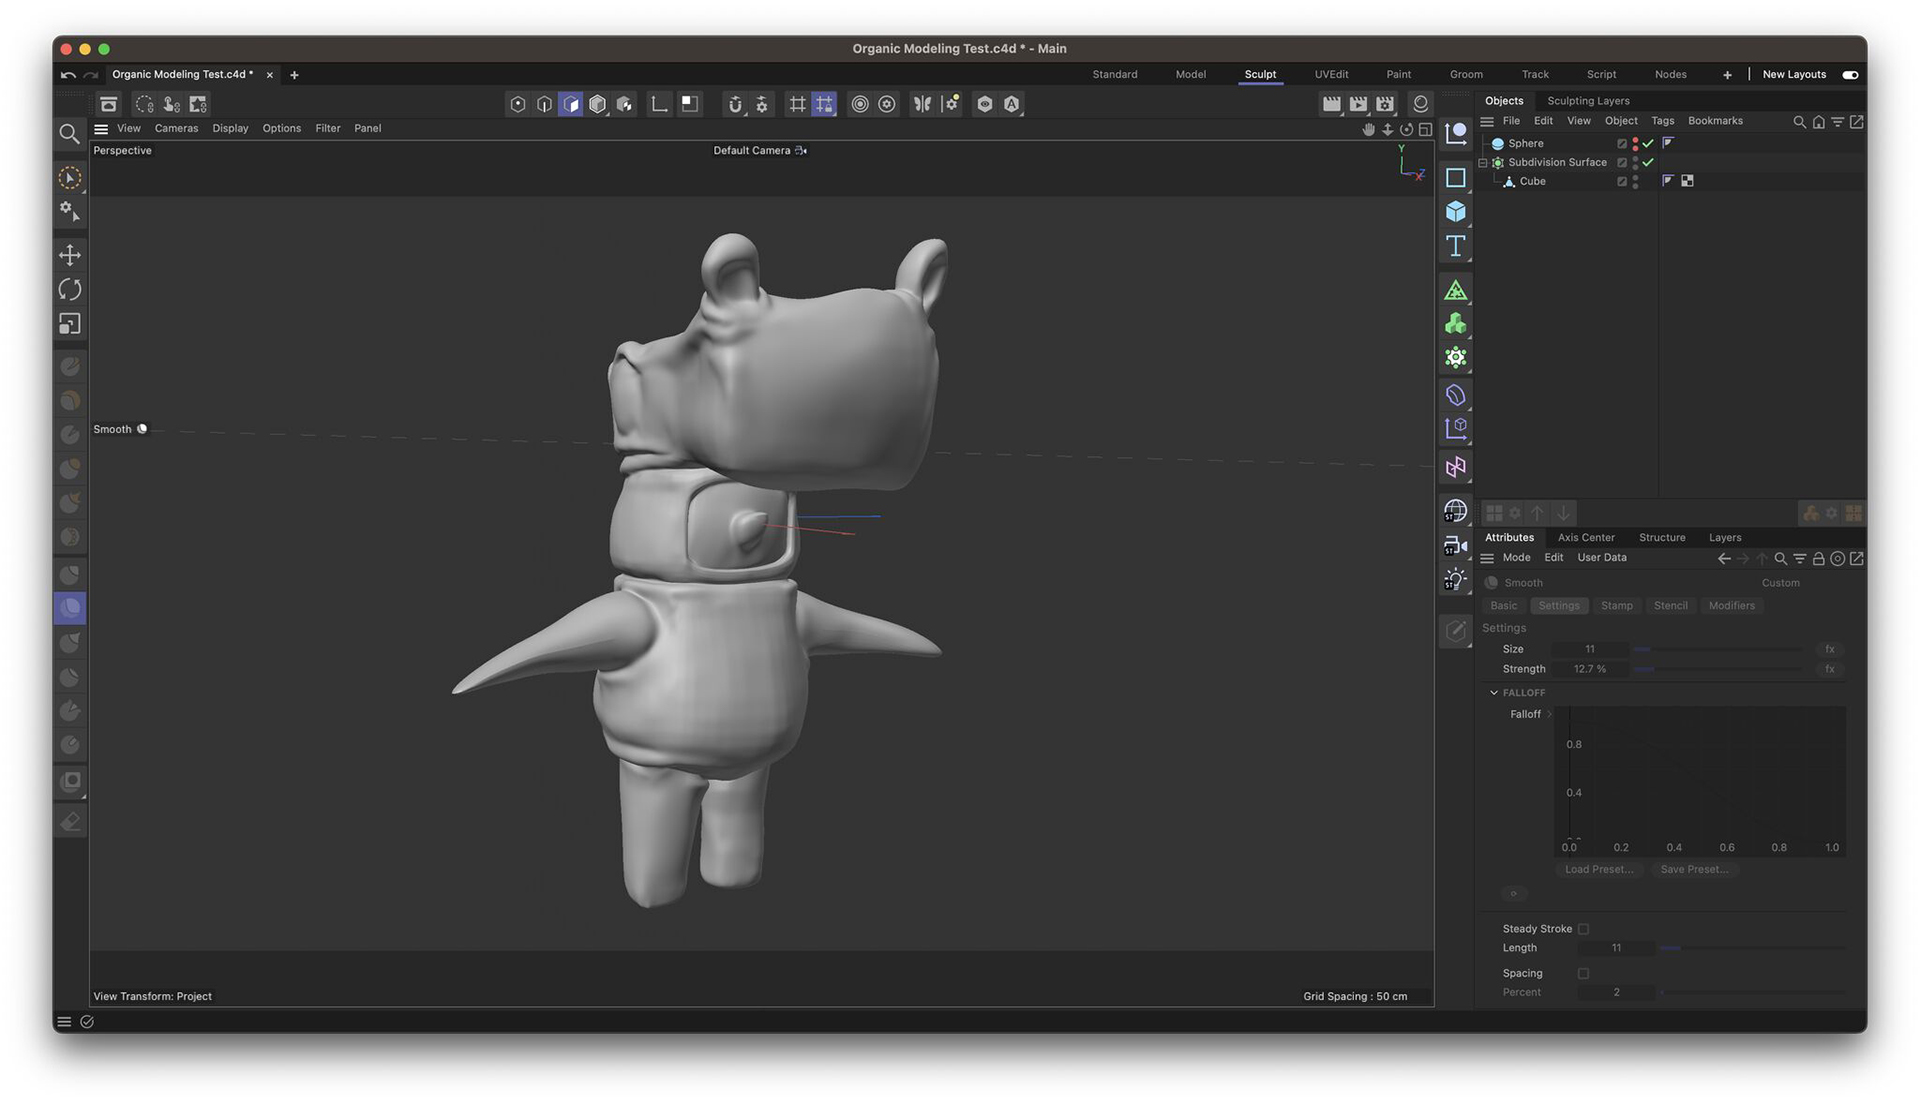
I didn't have access to ZBrush, didn't know Blender, hadn't found Nomad yet, so I was going to give Cinema4D a go with it's organic sculpting tools. I am a novice here, so it was a truly fresh take on how these tools would work. I poked and prodded at the mesh for quite longer than I expected, but did start to see some form of the character come to shape over time. After longer than I expected, I was able to get a model I was happy with and was ready to create some UV maps. In my experience, C4D doesn't really excel at organic scultping, and has never excelled at UV mapping, so this process was more difficult and drawn out than it should have been.
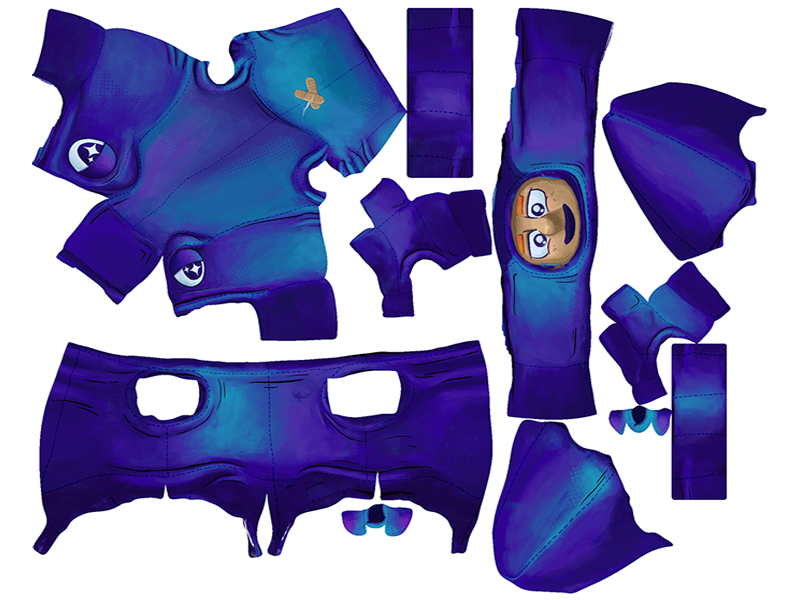
Ditching PS and C4D for ProCreate and Nomad
With the UV maps created, I began to paint the textures in Photoshop. I learned this technique many years ago and have seen it used with results. In this instance, it really wasn't working. The problem was that there were seams all around the UV so the mesh would unfold properly, which are shown in the map below. It was near impossible to create seamless gradiations over these areas in Photoshop and so I experimented with ProCreate on the iPad Pro because of it's ability to import mesh and directly manipulate it. At the same time, I discovered Nomad Sculpt on iPad Pro and found it's toolset compared far better than C4D.
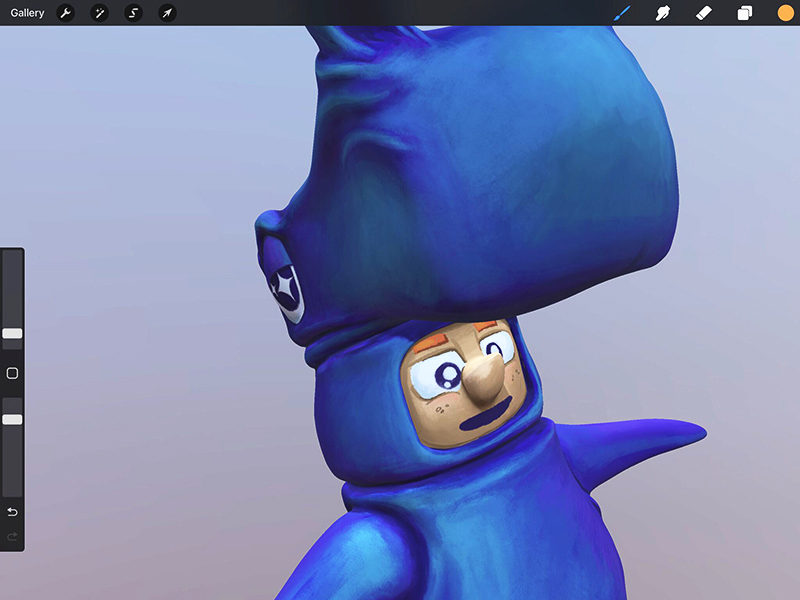
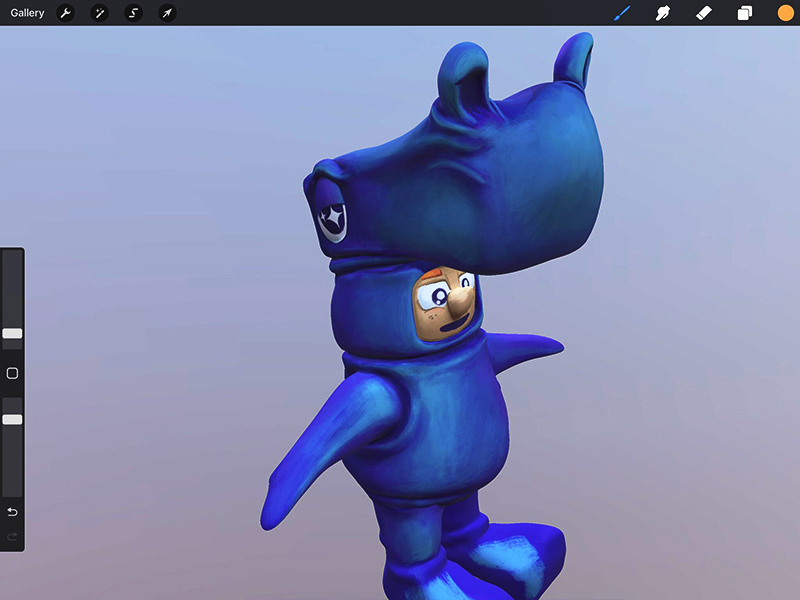
Painting Directly on Mesh Changes the Game
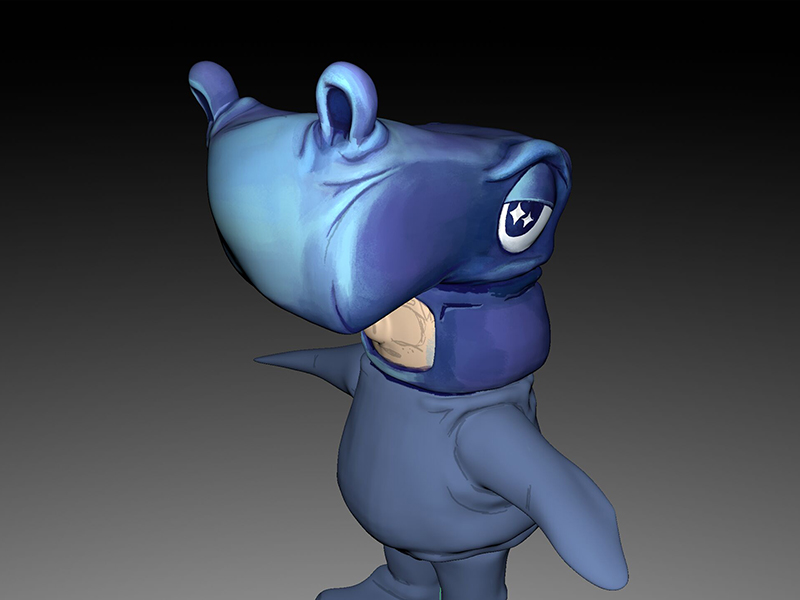
Bringing the character into ProCreate was when the design really started to come alive. ProCreate has such an incredible library of 3rd party brushes, which any one can be used in the painting process. Pair that with the fact that I could create layers on the map as well as I can paint directly over the seams so that they are made seamless, this approach was a much better experience than the Photoshop route. Substance Painter probably would have be the most ideal choice, but this process was about using what I had to create what I could and not have subscriptions to all the things.
Problematic Mesh Weighting and an Awkward Pose
Being a Cinema4D user for over 20 years, I have loved using the program but, at the same time, found that it doesn't really excel in quite a few areas. I had never rigged a character before, so it could be a beginners issue, but I found that the default weighting of the mesh from the rigging process was not sufficient in bending the geometry in a natural way and many parts of the costume were folding in on itself. I tried some manual brushing of the weight maps hoping to clean it up, but wasn't quite able to find a reasonable solution. In comparison, I rigged this same character in Blender 4 and found that the default weighting was far more forgiving in the way the mesh moved around. It wasn't perfect, and the problem could easily be with my lack of experience in proper weighting, but I had a much better result after the initial rigging in Blender than I did in Cinema4D. I really enjoyed the look of the character in the space and how RedShift rendered it out, but the character is in a really awkward pose because the mesh wasn't working quite right.